Compare results
Enable the compare jobs mode and compare the thermal results of the conformal and conventional cooling designs.
The conventional cooling job is solved. For more information, see Setting up and running a conventional cooling design.
-
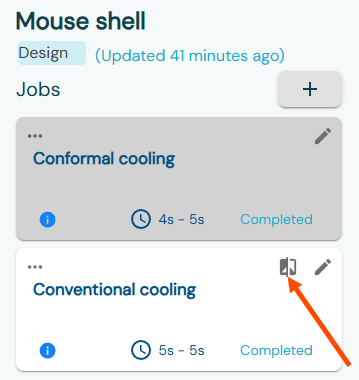
On the Jobs panel, in the Conventional
cooling job card, click Compare Jobs
 to open the compare jobs mode.
 The jobs results are displayed side-by-side.
 -
Rotate your model using the model manipulation tools to inspect the freeze time
distribution on your plastic part.
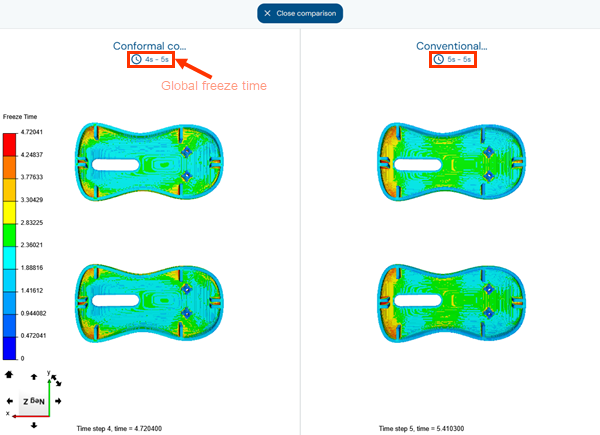 Notice that the global freeze time for conformal cooling is 20% shorter compared to conventional cooling.
 -
In the Results panel, turn on the
Channels toggle to display the channel
locations.
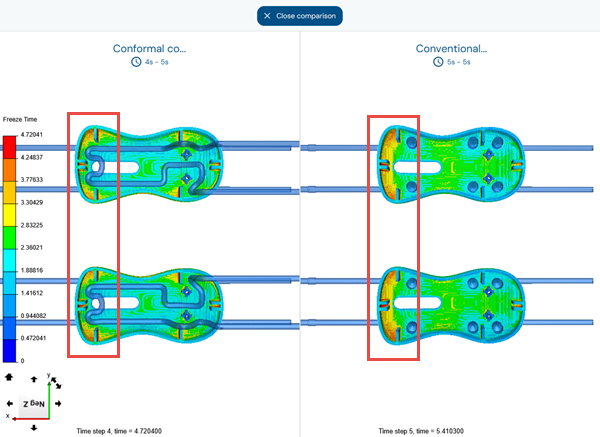 The freeze time is reduced in the curved sections of the mouse shell because the conformal cooling design allows the cooling channels to reach those areas.In the conventional cooling model, the freeze time is higher in the left area of the mouse shell cavity because neither the cooling lines nor the baffles can effectively extract heat from these regions. The conformal cooling model places channels closer to these areas, reducing local freeze time and contributing to a shorter overall freeze time for the plastic part.
 -
From the Type list, select
Temperature to display the temperature distribution
on the plastic part.
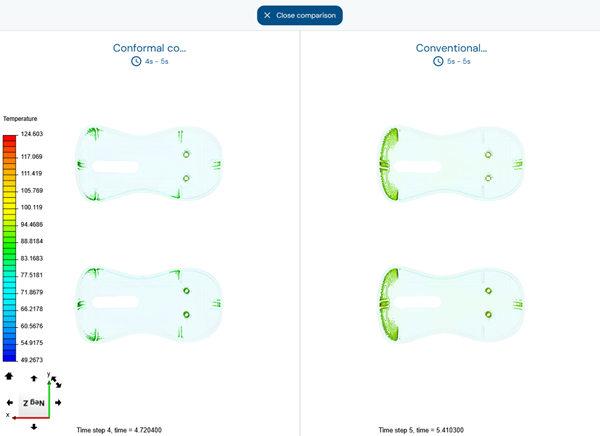
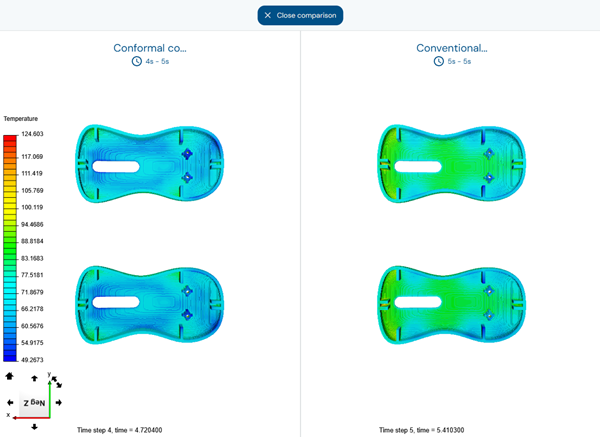 The temperature results show that the conformal cooling channels, designed to follow the plastic part’s geometry, improve heat dissipation inside the mouse shell cavity. This leads to a more uniform temperature distribution compared to conventional cooling, significantly reducing the risk of part warpage and ensuring better part quality.
 -
Turn on the Filter toggle, then adjust the range slider
around the target cooling temperature. For example, from 100 °C to 105 °C.
 The regions within the selected temperature range are displayed. This helps you compare how the high-temperature regions are reduced in the conformal cooling design compared to the conventional cooling design.
By using the conformal cooling design, you can achieve a 20% shorter cooling time, a more uniform temperature distribution, and reduced overheating in critical areas. By redirecting the flow to areas requiring more cooling, the conformal cooling leads to a better part quality and shorter cycle times, helping you optimize your molding process.
You have completed this tutorial. You can select another tutorial from the list on the left.