
Define the mold
Categorize your mold components to allow the solver to identify them. You will then define their materials.
-
In the display window, select the mold cavity.
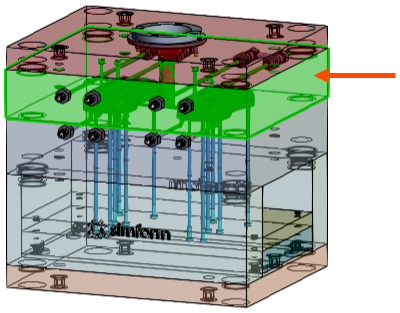
-
In the Mold Group 1 card, click add
 to assign the cavity as a part of the mold group 1.
Click expand
to assign the cavity as a part of the mold group 1.
Click expand to view the list of added components for
verification. If necessary, you can click remove
to view the list of added components for
verification. If necessary, you can click remove  to remove a categorized component from the mold
group.
to remove a categorized component from the mold
group. -
In the Mold Group 1 card, click hide
 to hide the categorized component to verify that
your components are correctly categorized.
to hide the categorized component to verify that
your components are correctly categorized.
-
Repeat steps 2 and 3 to select the sprue bushing and add it as a part of
Mold Group 1.
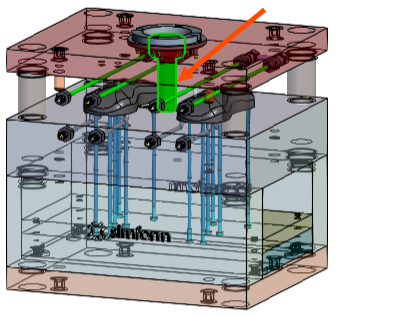
-
In the display window, select the mold core.
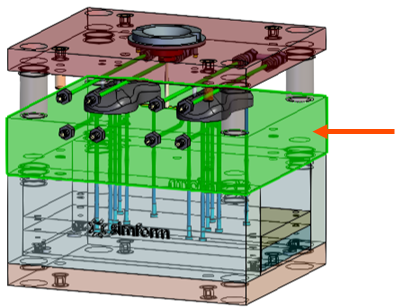
-
In the Mold Group 2 card, click add to assign the core as a part of the mold group 2.
-
In the Mold Group 2 card, click hide to hide the categorized component.
-
Repeat steps 6 and 7 to select the ejector pins and add them as a part of the
Mold Group 2.
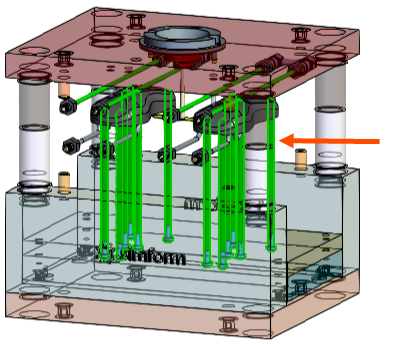
You must categorize all components in contact with the plastic part into one of the mold groups to ensure accurate temperature results. Excluding them from the analysis creates additional sources of cooling that distorts the temperature results and the cooling time estimation.