View results
Display the freeze time and the temperature distribution on the plastic part and mold to locate regions where you can improve the cooling and optimize the cooling time.
-
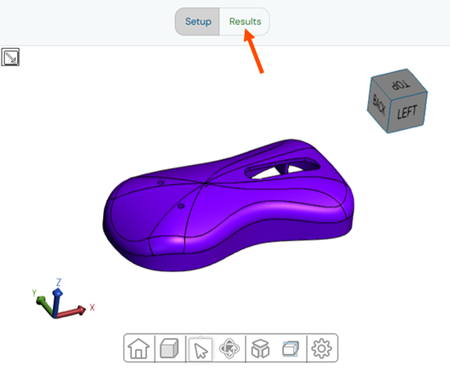
Click Results to open the results page.

-
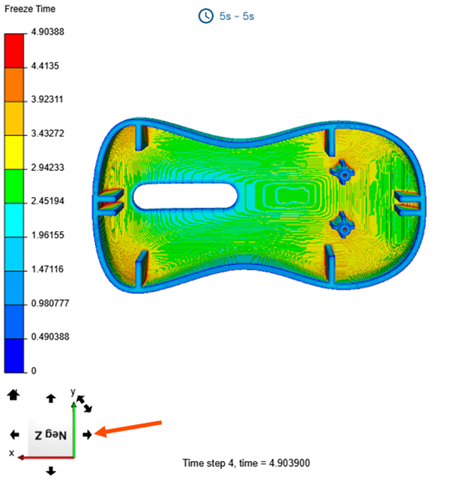
Rotate your model using the model manipulation tools to inspect the freeze time
distribution on your plastic part.
 The display window shows the global and local freeze time, or safe ejection time, distribution on your plastic part in seconds.
 -
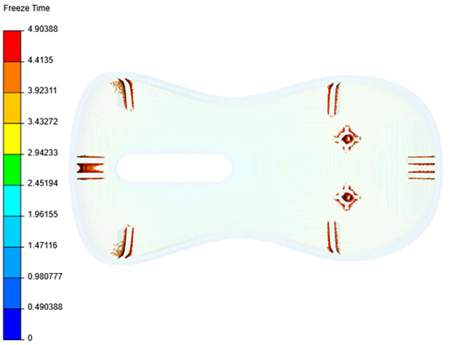
In the Display Mode panel, select Filter
Plastic, then move the slider to the target cooling time. For
example, 4s.
 The display window shows the areas of the plastic part where the freeze time is higher than the target cooling time. You can consider adding cooling channels or baffles in these regions to improve cooling efficiency.
 - From the Results list, select Plastic Volume to display the volume temperature distribution of the plastic part.
- Select Cutting Plane and the X axis.
- Select the Invert check box to invert the cutting plane direction.
- Move the slider to change the cutting plane position to identify the regions with high temperatures. For example, to the -0.032 position.
-
Select a region with a high temperature in your plastic part to inspect its
local result.

You can use the local freeze time and temperature results to identify areas that take longer to cool down. This helps you optimize the plastic part—for example, by reducing wall thickness—and improve the cooling system design by adding highly conductive inserts or baffles. You can also use the global freeze time to accurately estimate the part cost for a quote and provide a realistic cycle time target for the mold maker. Once the mold is designed, you can compare its actual cooling performance to the feasibility analysis of a well-designed mold.
You have completed this tutorial. You can select another tutorial from the list on the left.
